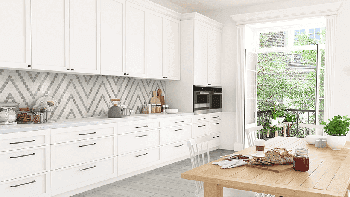
Cooking for a big family is fun and fulfilling. But when it comes to boiling pasta, making soup, or preparing large family meals, carrying heavy pots full of water from the sink to the stove can quickly become a chore. My back hurts just thinking about it.
This is exactly why pot fillers have become one of the most popular kitchen upgrades in recent years. They make cooking more convenient, reduce strain on your back, and add a touch of luxury to your kitchen.
However, before you rush out and install one, there are a few important decisions to make. What is the ideal pot filler height? Should a pot filler be centered over the stove or offset to one side? How far should it extend? And is a pot filler actually worth the investment?
This guide covers everything you need to know before installing a pot filler in your kitchen.
- Quick Read
- What Is the Ideal Pot Filler Height?
- Pot Filler Height Above Stove
- Recommended Pot Filler Heights by Pot Size
- Do I Really Need a Pot Filler?
- Is a Pot Filler Worth It?
- Pot Filler Installation and Cost
- Placement of Pot Filler over Stove
- Common Pot Filler Installation Mistakes
- Types of Pot Fillers
- Frequently Asked Questions
- Final Thoughts
- Latest Posts
Quick Read
Most pot fillers are installed 20 to 24 inches above the stovetop, although the ideal height depends on your cookware and kitchen layout. A practical rule is to position the faucet 2 to 3 inches higher than your tallest frequently used pot. This provides comfortable clearance while helping protect the faucet from excessive heat.
What Is the Ideal Pot Filler Height?
If you’re looking for a quick answer, most kitchen designers and installers recommend placing a pot filler between 20 and 24 inches above the cooking surface.
This range provides enough clearance for large stock pots while keeping the faucet easy to reach and operate.
However, there is no single universal measurement that works for every kitchen.
The ideal pot filler height depends on:
- The height of your cookware
- The distance between your cooktop and range hood
- The reach of the faucet arm
- Your personal cooking habits
- Local building requirements
A family that frequently cooks large batches of pasta or soup may need more clearance than someone who mostly uses small saucepans.
For that reason, many professionals recommend measuring your tallest frequently used pot rather than blindly following a standard measurement.
Quick Tip: Place your tallest regularly used pot on the burner and measure its height. Install the pot filler approximately 2 to 3 inches above that measurement for comfortable clearance.
Pot Filler Height Above Stove
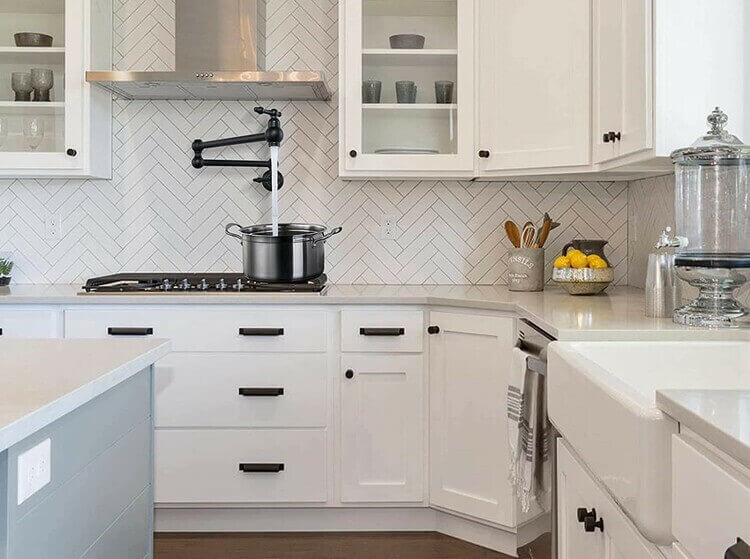
A pot filler should typically be installed between 20 and 24 inches above the stove or cooking surface.
You may occasionally find older recommendations suggesting heights as low as 12 inches. While this can work in certain situations, it is generally considered too low for many modern kitchens.
A lower installation height may:
- Restrict access to taller cookware
- Expose the faucet to more heat
- Make operation less convenient
On the other hand, installing the faucet too high can create problems as well.
If the pot filler is mounted excessively high:
- Water may splash more when filling smaller pots
- The faucet may become difficult to reach
- It may interfere with range hood placement
The goal is to strike a balance between accessibility and functionality.
For most homeowners, the 20-to-24-inch range remains the sweet spot.
Recommended Pot Filler Heights by Pot Size
The size of your cookware can help determine the ideal installation height.
| Pot Type | Recommended Pot Filler Height |
|---|---|
| Small Saucepan | 18–20 inches |
| Dutch Oven | 20–24 inches |
| Stock Pot | 22–26 inches |
| Large Pasta Pot | 24–30 inches |
These measurements are general guidelines rather than strict rules.
If you regularly use oversized canning pots or commercial cookware, you may need additional clearance.
Do I Really Need a Pot Filler?
A pot filler, also known as a pasta arm or kettle faucet, is a wall-mounted faucet installed above a cooktop or range.
Its purpose is simple.
Instead of filling a heavy pot at the sink and carrying it across the kitchen, you can fill it directly on the stove.
Do you absolutely need one?
No.
People cooked perfectly fine for generations without pot fillers.
But once you have one, it becomes surprisingly difficult to imagine going back.
A pot filler can be particularly useful if:
- You cook frequently
- You often prepare pasta, soups, or stews
- You have back problems
- You have mobility limitations
- You regularly use large stock pots
Another overlooked benefit is preventing spills.
Anyone who has ever carried a large pot full of water across the kitchen knows that some water almost always ends up on the floor.
That may not seem like a big deal until you have hardwood floors or expensive cabinetry nearby.
A pot filler eliminates that issue entirely.
And let’s be honest. They look pretty impressive too.
A beautiful pot filler can instantly become a focal point behind your cooktop.
Look how this simple kitchen backsplash gets the wow factor by adding the Delta Faucet Traditional Stainless Steel Pot Filler Faucet (see on Amazon) to it.

Is a Pot Filler Worth It?
Whether a pot filler is worth the investment depends largely on your cooking habits.
For some homeowners, it’s a luxury upgrade.
For others, it’s a genuinely useful kitchen feature.
Reasons a Pot Filler Is Worth It
- Reduces heavy lifting
- Makes filling large pots easier
- Saves trips between sink and stove
- Adds visual appeal
- Improves accessibility
- Convenient for frequent cooks
Reasons It May Not Be Worth It
- Additional plumbing costs
- Another fixture to clean
- Potential maintenance over time
- Limited use if you rarely cook
If you cook several times per week and frequently boil water, most homeowners find the convenience worthwhile.
If you rarely cook or mainly use small cookware, you may not see enough benefit to justify the cost.
Pot Filler Installation and Cost
Installing a pot filler is more involved than installing a standard faucet.
Because the faucet is mounted on a wall rather than a countertop, a water supply line must be routed to the installation location.
This often requires opening part of the wall behind the stove.
For that reason, the best time to install a pot filler is usually during:
- New home construction
- Kitchen remodeling
- Backsplash replacement
- Major renovations
Planning ahead can significantly reduce installation costs.
Labor Cost
If a water line already exists behind the stove, installation may be relatively straightforward.
However, most kitchens are not pre-plumbed for pot fillers.
In that case, your plumber may need to:
- Open drywall
- Remove backsplash materials
- Extend water lines
- Install shutoff valves
- Repair finished surfaces
Depending on complexity, labor costs can vary significantly.
Typical labor costs in 2026 range from approximately $300 to $1,000 or more.
Pot Filler Faucet Cost
The faucet itself is often the smaller portion of the overall project cost.
Entry-level models (see on Amazon) that are actually worth considering typically start around $150. Note that there are some even as low as $60, but I would personally not recommend those because your investment should be reliable enough to last at least a few years, and a low quality faucet will require replacement in a few months.
Mid-range options (see on Amazon) generally fall between $250 and $600.
Luxury designer models (see on Amazon) can exceed $1,000.
Typical Total Installation Cost
| Item | Typical Cost |
|---|---|
| Pot Filler Faucet | $150–$1,000+ |
| Plumbing Labor | $300–$1,000+ |
| Wall Repair & Finishing | $50–$500+ |
| Total Project Cost | $500–$2,000+ |
Bonus Advice: If you’re already remodeling your kitchen, adding a pot filler during construction is usually far cheaper than installing one after everything is finished.
Placement of Pot Filler over Stove
Besides height, placement is another important decision.
Centered Pot Filler
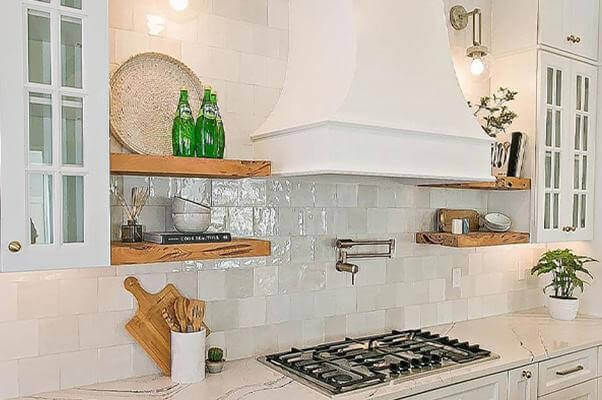
A centered pot filler is the most common installation choice.
It creates a balanced appearance and allows the faucet to reach multiple burners.
Most kitchen designers prefer this approach because it looks symmetrical and works well with most stove layouts.
For homeowners who prioritize aesthetics, centered placement is usually the safest option.
Offset to the Left or Right
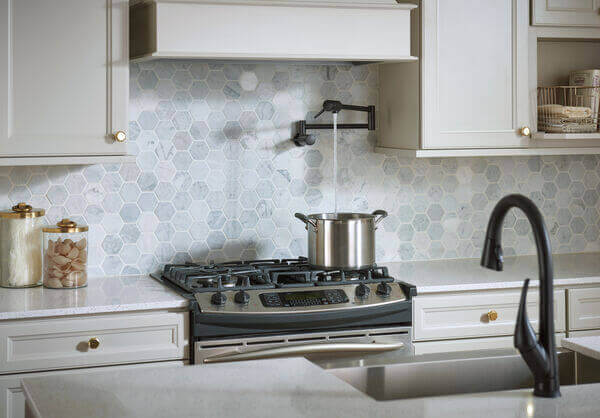
Some homeowners choose to offset the faucet slightly to one side.
This can work particularly well if:
- You have a favorite burner
- One side of the cooktop gets used more often
- The faucet arm needs additional reach
Offset placement can also allow the faucet to reach nearby countertop space.
Side Placement

Instead of mounting the faucet directly behind the stove, some homeowners install it on an adjacent wall.
This approach offers several advantages.
The faucet stays farther away from heat.
It can be used for additional tasks.
And it often creates a cleaner visual appearance.
In busy kitchens, a side-mounted pot filler can function almost like a secondary faucet.
Common Pot Filler Installation Mistakes
Many homeowners focus only on appearance and forget about functionality.
Avoid these common mistakes.
Installing the Faucet Too High
A very high installation may seem like a good idea initially.
However, it often leads to excessive splashing and awkward operation.
Most installations work best within the 20-to-24-inch range.
Installing It Too Low
A low-mounted faucet can interfere with large cookware and may receive excessive heat exposure.
Always leave adequate clearance above your tallest regularly used pot.
Ignoring Reach Length
Some homeowners choose a beautiful faucet only to discover it cannot reach all burners.
Before purchasing, measure your cooktop carefully.
Forgetting About the Range Hood
The space between your cooktop and range hood is limited.
A poorly positioned pot filler can create clearance issues.
Always account for hood placement before finalizing installation height.
Prioritizing Appearance Over Function
A perfectly centered faucet may look fantastic.
But if you always use one specific burner, a slight offset may actually be more practical.
Think about how you cook before making a final decision.
Types of Pot Fillers
Pot filler height and placement may also depend on the style you choose. They come in six main types.
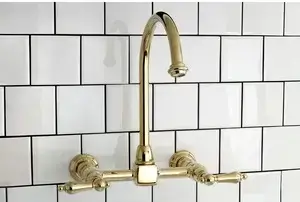
Fixed Pot Filler
Fixed pot fillers resemble traditional faucets. They remain stationary and cannot extend or swivel. These are generally installed above a single burner.
The Kingston Wall Mount Bridge Kitchen Faucet (see on Amazon) below is an example of a fixed pot filler. It can be installed over a stove on the wall or kitchen backsplash in the same way that it’s installed over a kitchen sink.
Swing Out Pot Filler
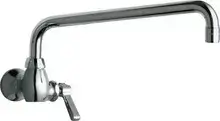
Swing out pot fillers are single-jointed pot fillers mounted to a wall. They can swivel left and right and reach all of the back burners. If you have a small cooktop, like a two-burner stove, this type is ideal as it can easily reach both burners.
Below is a single-jointed, single-arm, swing out pot filler from Chicago Faucets.
Double Jointed Pot Filler
This is the most popular type of pot filler.
As the name implies, double-jointed pot fillers have two swing joints which allow these faucets to expand and have a much greater reach and flexibility. This is the most common and preferred type of pot filler because of its ability to reach all burners over even a large cooktop.
With an average full-length range of 22 to 24 inches, some of these can even extend to counters near the stove top. When not in use, they can be neatly folded against the wall.
For most homeowners, this style offers the best combination of convenience and versatility.
This Delta Faucet Contemporary Stainless Steel Pot Filler (see on Amazon) is a good example of a double-jointed pot filler.

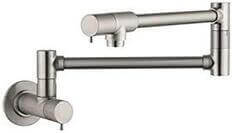
Articulating Pot Filler
Articulating models offer even greater movement and flexibility.
This type of pot filler has an articulated arm capable of a 360 degree rotation. This makes it versatile and far reaching in all directions, making them ideal for larger cooking areas.
This Hansgrohe 2-Handle Pot Filler with 360-Degree Swivel (see on Amazon) complements any kitchen backsplash.
Cooker Island Pot Filler
All the above types of pot fillers are wall-mounted and are typically installed on the backsplash behind the stove. However, if your cooktop is located on a kitchen island, a deck-mounted pot filler may be the best solution.
These require plumbing beneath the floor rather than behind a wall.
This Hansgrohe Starck Deck-Mounted Pot Filler (see on Amazon) is a good example in this category.

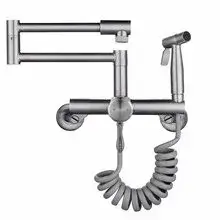
Pot Fillers with Sprayers
If you want to add on the versatility, some pot fillers also include a sprayer attachment. The sprayer head could be a pull-down sprayer, pull-out sprayer, or a side sprayer.
You can go for these if you want the water to be sprayed into your cooking pots instead of running down straight like from an ordinary faucet. However, for this type you will need to add a few inches to the pot filler height.
Below is an example of a pot filler with side sprayer.
Frequently Asked Questions
Final Thoughts
A pot filler is one of those kitchen upgrades that many homeowners initially consider a luxury. Then they start using it and wonder how they ever lived without it.
The most important decision is getting the height right.
For most kitchens, installing a pot filler 20 to 24 inches above the stove provides the ideal balance of convenience, accessibility, and safety. You can fine-tune that measurement by considering the height of your tallest frequently used pot and the layout of your cooking space.
Take the time to plan carefully before installation. Determining the correct pot filler height, placement, and reach in advance can save you from costly modifications later and help ensure your new fixture is both beautiful and practical for years to come.
If you have any questions or experiences with pot filler installation, feel free to share them in the comments below. I would love to hear from you.
You may also like: Do Pot Fillers Add Value to the Home?